Wedding season is coming, and if you're looking for a bridesmaid headband but can't find one that suits your style, why not try making it yourself? Here's a solution, and more importantly, a technique you can use with a variety of materials!
So here is a DIY bridesmaid headband, elegant, simple and very effective!
What I need to make it: hot glue, shears, stapler, scissors, decorative aluminum wire, satin ribbon, a headband, wax flowers (better known as wax flowers), but small artificial flowers are also fine, and some phormium leaves.
We always have plenty of alternatives when it comes to leaves… for this reason, the well-known and versatile aspidistra leaves are also perfect for our headband.

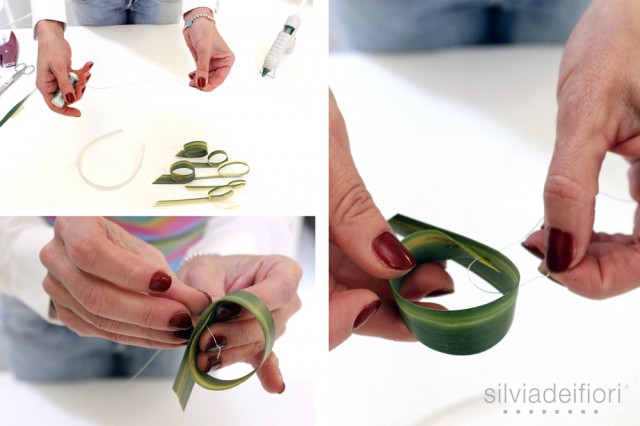
I take a phormium leaf, gently press down on the center of the leaf, and divide it. This creates two leaf halves of similar size. I repeat the process on the two resulting halves, and repeat the process again until I obtain many strips about 1/1.5 cm high.

I roll the phormium strips up. I secure the leaf with a stapler, and with scissors I cut off the excess phormium like a salami slice.
I repeat the same process with more leaves, choosing leaves with different shades of color. I want it to be an elegant yet "sparkling" headband!

I take the decorative aluminum wire (found in hobby shops) and pass it through the leaf.
I attach the phormium leaf to the headband with the inserted aluminum foil. I repeat the same process with the other leaves, playing, as always, with heights, colors, and volumes. Once the leaves are attached to the headband, I trim and cut the phormium leaves.

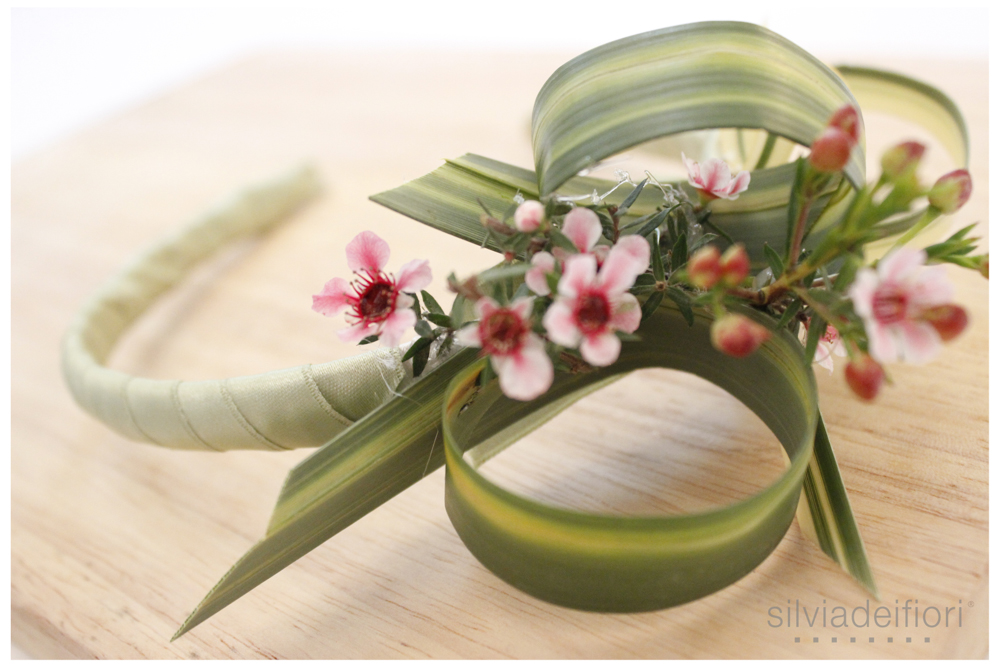
The floral and romantic touch is a wax flower. I cut a few and hot glue them to my headband.
Remember that the variations are truly endless… You can also use artificial flowers and adapt the colors according to the season!
The floral effect is truly romantic! This headband, if you think about it, is suitable for both little girls and older women... and why not, this floral headband could also be used to create beautiful hairstyles for bridesmaids, wedding guests, or even for special occasions.

Taking special care not to damage the part where the leaves are attached, I cover the headband with satin ribbon. I add an extra layer of ribbon where the wire is. Then I continue along the entire length of the headband, making tight, even turns.

And there you have it! My headband for a truly romantic-chic wedding is ready! Made in no time, with little material but so much imagination!
Always remember to experiment with colors, ideas, and shapes. The key is to find the right balance between the elements! Have fun!